Showing posts with label vegetarian. Show all posts

Monday, January 11, 2010

Black bean soup two ways

I love to cook and often become happily obsessed with trying new recipes. That said, I can also be rather lazy. When the slug in me wins out (but my appetite remains voracious), my saving grace is the much maligned leftover. I LOVE leftovers!! I cook, for example, a big batch of spicy black bean soup and freeze a portion of it for future hectic Wednesdays or boozy football Sundays. I eat said soup, eat it again (and probably again-I have a high tolerance for repetition and, luckily, so does my boyfriend). Then, when I finally tire of eating the same old delicious soup, I use it to make a brand-spanking-new dish. Enter baked potato skins with black beans and three cheeses. Then I retire to the couch.


Chipotle Black Bean Soup
Serves a small army

olive oil
2 large onions, chopped
1 red bell pepper, chopped
1 7.5 oz. can chipotles in adobo sauce, chopped (this will be messy:)
4 15 oz. cans black beans, drained, and divided in half
2 28 oz. cans whole peeled tomatoes
hot water
2 bay leaves
4-5 sprigs cilantro, plus more for garnish
salt to taste

optional garnish: chopped cilantro, cheese (I like cojito or feta), sour cream, avocado, toasted pepitas, etc.
  • In a large stock pot over moderate heat, use enough oil to coat bottom and cook onions and peppers until soft, about 10-15 minutes. Salt onion mixture to taste.
  • Add chipotles and adobo sauce, and then half the black beans. Stir to coat beans with oil and adobo. Again, add salt to taste.
  • Add tomatoes and enough hot water to cover beans by about two inches (your pinkie is a good measuring stick). Turn heat to high and bring to a slow boil, stirring often.
  • Once soup has boiled, turn heat down to medium low, add bay leaves and cilantro and cook for about an hour. Again, salt to taste.
  • Remove bay leaves and cilantro and puree soup until it's almost smooth. I highly recommend that you get an immersion blender, if you don't have one, because they are super handy. If not, puree the soup in batches in your standing blender. Make sure not to fill your blender more than half way unless you want to wear your soup!
  • Add remaining black beans and cook until they're warmed through, 15-20 minutes. Add salt, one last time, if necessary.
  • Serve hot and enjoy!
A quick note: Because you salt the soup a number of times while you are making it, don't be heavy handed; a small pinch will do. Most importantly, make sure to taste throughout the process. And, trust those taste buds of yours!

Freeze soup, cooled completely, for up to six months. Defrost under running hot water.


Turn your soup into...
Baked Potato Skins with Black Beans and Three Cheeses
Serves 2-4

1 1/2 cup black bean soup
4 baked potato skin halves leftover from making hash browns
1/4 cup each, shredded and combined: cheddar and jack cheese
1/4 cup feta cheese
cilantro, chopped
  • In a small sauce pan over moderate heat, cook down the black bean soup until it has thickened and you have about one cup
  • Preheat broiler
  • Place potato skins in an oven safe baking dish. Fill each potato with one quarter of the black beans. Cover beans evenly with the cheddar and jack cheeses. Broil until cheese is bubbling and starting to brown.
  • Top baked potato skins with feta cheese and cilantro, serve hot and enjoy!

Wednesday, January 6, 2010

Hash browns

I like to bake the potatoes the night before (as I am NOT a morning person). With this step taken care of, the hash browns will take all of 15 minutes. Order up!

Hash browns
serves 2

2 baking potatoes, scrubbed and dried
butter or oil
1 medium onion, chopped
salt and pepper to taste
  • Preheat heat oven to 350. Prick spuds a few times with a fork and brush lightly with oil and bake for about an hour, or until soft to the touch. Allow to cool enough to handle, cut in half and scrap insides into a small bowl. Set skins aside for another use.
  • In a small saute pan over moderate heat, cook until soft, about 7-8 minutes. Increase heat to high and add potatoes and season well with salt and pepper. Cook until golden brown, 5-6 minutes, flip and cook for another 5ish minutes. Serve hot.
  • Enjoy!
Use the leftover potato skins to make Baked Potato Skins with Black Beans and Three Cheeses

Tuesday, December 15, 2009

Avocado Toast

I feel like I'm moving a million miles an hour these days. Perhaps that's hyperbole, but I am movin', so I'll cut right to the point- A GIRL'S GOTTA EAT and creative cooking and leisurely eating is certainly not in the cards until this here catering season comes to a screeching halt. Until I've got the time, I'll just have to eat fast food. Enter the avocado.


Now this is what I call fast food! It's healthy, tasty, totally satisfying and, well, fast. What you see pictured below is unadorned avocado toast. Go ahead dress her up though... add olive oil and some cayenne pepper for color. Top with a handful of spicy arugula, a spritz of lemon juice and freshly cracked black pepper. Or throw on some diced pickled jalapeno. Yummmy vinegary jalapenos;) Whatever you do, get on the avocado bandwagon. Pick up a couple once a week, give them a day or two to ripen and you'll have a happy breakfast, lunch or dinner at the ready.


Avocado Toast

serves 2

1 ripe avocado
2-4 slices of bread, depending on the size/shape and how hungry you are
salt
  • Cut the avocado in half by rotating a sturdy knife around the pit. Rotate the halves to split and remove the pit. Slice avocado (see below).
  • Toast bread to desired darkness. Spoon avocado onto toast and spread evenly. Sprinkle with salt.
  • Enjoy!

Thursday, December 3, 2009

Roasted Carrot Soup

This warm weather is for the birds. It is December after all. It's soup season. Soup season! So, I'm gonna soup and stew and roast and braise and thumb my nose at this weather by mashing my pretty purple carrots into a soothing soup. You heard me. I need to be soothed during this hustlin' and bustlin' time of year.

Roasting the carrots and onions until they are caramelized and slightly blackened brings out their sweet earthiness. The lemon juice brightens and balances. I feel better already.


Roasted Carrot Soup

8 medium carrots (about 1 1/2 lb), cut into 1 inch pieces
2 red onions, quartered
8 garlic cloves
olive oil
salt and pepper
3 1/2 cups water or vegetable stock
juice of 1/2 a lemon
  • Preheat the oven to 400.
  • Place carrots on one baking sheet (lined with parchment for easier clean up, if you like) and the onions and garlic on another. Toss vegetables with olive oil, season liberally with salt and pepper and roast until they are soft and slightly blackened, about 30 minutes.
  • Meanwhile, in a large pot, boil the water or stock. Add the cooked vegetables and puree with a hand blender until smooth, adding more hot liquid for a thinner soup. Alternatively, puree in batches in a blender or food processor.
  • Stir in the lemon juice, add salt to taste and simmer for 10-15 minutes.
  • Enjoy!


Thursday, October 22, 2009

Apple Muffins

These muffins are a great fall treat. Eat 'em for breakfast on-the-go, as an after school snack, or serve them drizzled with warm caramel sauce for dessert.


Apple Muffins

makes 12

1 cup whole wheat flour
1 cup all-purpose flour
1 t. baking powder
1 t. baking soda
1/4 t. salt
1 T cinnamon
1/2 cup (1 stick) butter, room temperature
3/4 cup packed brown sugar
1 egg, lightly beaten
1 cup vanilla yogurt, stirred well (buttermilk is great too)
2 large apples, coarsely chopped
  • Preheat oven to 450 and either grease or line a 12 cup muffin tin.
  • In a medium bowl, combine the flours, baking powder, baking soda, salt and cinnamon.
  • In a mixing bowl, cream the butter until it has lightened in color and become slightly fluffy. Add the sugar, mix until combined, then add the egg. Slowly add the yogurt; mix well.
  • Stir the dry ingredients into the wet and, while there are thick streaks of flour, add the apple. Mixture will be very thick.
  • Using an ice cream scoop, divide the batter into the muffin cups.
  • Bake for 10 minutes, turn the temperature down to 400 and bake for 18-20 minutes.
  • Cool in tin for five minutes before transferring to a wire rack to cool completely.
  • Enjoy!

Wednesday, October 7, 2009

Roasted Eggplant Dip

I implore you to double, triple or quadruple this recipe. Seriously, so that no one gets hurt in the rush to scoop up every last bit of dip. It's THAT tasty! The roasted eggplant is silky smooth after a whiz in the food processor. And with loads of parsley and a touch of lemon, it's herbaceous and bright. The perfect antidote for a blustery fall day.


Roasted Eggplant Dip
serves 2

3 small eggplants
2 garlic cloves
juice of half a lemon
1/2 cup parsley, roughly chopped
1/3 cup olive oil
salt and pepper to taste
  • Preheat oven to 400.
  • Pierce each eggplant with a fork several times. Roast until tender, 25-30 minutes. Allow to cool slightly and remove the pulp from the skin.
  • In the bowl of a food processor, combine the eggplant, garlic, lemon juice and parsley. Pulse until combined.
  • With the processor running, slowly add the oil. Combine until smooth. Add salt and pepper to taste.
  • Serve with toast, pita, bread sticks, vegetables...
  • Enjoy!


Wednesday, September 23, 2009

peach jalapeno "salsa"

This really isn't salsa at all. It's basically sliced peaches, sliced jalapeno and a squeeze of lime. Savor the last-of-the-season peaches with a little bit of bite. (If you don't like it hot, dice the pepper and use sparingly.) Serve alongside turkey burgers or grilled chicken. Dinner is served.


peach jalapeno salsa


2 ripe peaches, sliced
1 jalapeno, ribs and seeds discarded; thinly sliced
juice of 1 lime
pinch sugar
  • Combine all ingredients and allow to rest for 20 minutes-ish so the flavas meld.
  • Enjoy!

Monday, August 17, 2009

Gazpacho


Hooray, it's tomato season! For the next month or so I can think outside of the can and use fresh tomatoes to my heart's content (literally). The irresistible sweet and acidic fruit never comes cheap and this summer the prices have been inflated due to devastating "late blight", a fungal disease that has knocked out a huge number of the tomatoes in the Northeast. Our cold and wet spring made for unhappy tomatoes. And, in turn, unhappy farmers, who often rely on tomatoes to turn a profit. So, all the more reason to get out there and buy what's left of this years not-so-bumper crop. Make some gazpacho...no cooking required!

Gazpacho

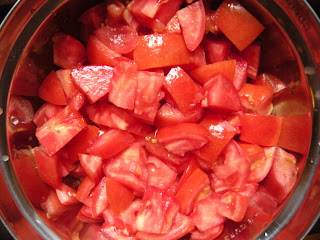
6 ripe tomatoes, cut into chunks
1/2 large cucumber--peeled, halved, seeded and cut into chunks
1 green bell pepper, coarsely chopped or, for added flavor, roasted and cut into strips
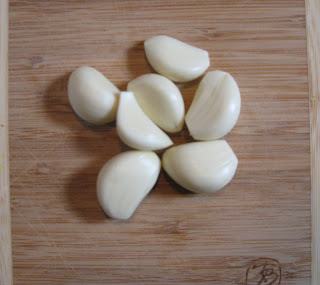
2 garlic cloves, smashed
1 cup water
1/3 cup extra-virgin olive oil
2 tablespoons sherry or red wine vinegar
salt to taste

optional garnish:
diced cucumber
sliced onion
hot sauce
  • In a blender or food processor, combine the tomatoes, cucumber, bell pepper, garlic, water, oil and vinegar and process until coarsely pureed. Season with salt and adjust amount of vinegar if needed. Refrigerate until chilled.
  • Serve in chilled bowls with garnish.
  • Enjoy!


Monday, August 10, 2009

Farro w eggplant + tomatoes


Hitting the farmers market late in the day might not be the best time to find a wide variety of produce, or if you're looking for something in particular. But, it is the best time to find a bargain. I brought home a bounty without spending a fortune!

Among other things, I got a big eggplant that I typically would've skipped in search of a couple of smaller ones, but it was slim pickins and the reduced price was right. With an eggplant in my possession and pasta on the brain (always), I bought some super sweet plum tomatoes to make a quick summer sauce. I ended up using farro instead of pasta and purslane (the guy at the market was practically giving it away) instead of basil in the sauce, so the following is merely a base recipe. Whatever you do though, this is a bowl full of summer goodness.

Farro w eggplant and tomatoes
serves 2 with a leftover lunch

3 T olive oil
1 large eggplant, cut into cubes
5 plum tomatoes, cut into a large dice
1 cup semi-pearled farro
1/4 cup sherry vinegar
1 T pine nuts, toasted
use any herbs you have on hand as garnish
  • In a large saute pan, heat olive oil over medium-high heat and saute eggplant until soft and caramelized, 10 minutes. Lightly season with salt, add tomatoes, reduce heat to medium and cook until most of the liquid has evaporated, 10 minutes. Add herbs and season to taste.
  • Meanwhile, cook the farro in boiling salted water until al dente, about 20 minutes, drain and add vinegar.
  • Serve sauce over farro and sprinkle with pine nuts.
  • Enjoy!

Sunday, July 26, 2009

White pizza w Swiss chard, goat cheese + garlic


For some reason I always get the hankering to make pizza in the middle of the summer when turning the oven up to 500 degrees borders on masochistic. I told myself that this year would be different. Simple. I'd wait until fall, when the first chill in the air would welcome the searing oven temperature and make for a cozy evening. But then the New York Magazine Cheap Eats issue showed up in my mailbox with its alluring pizza spread. Toast. I promptly made pizza (on what seemed like the hottest day of the summer to date).

The following recipe is adapted from the January (note the winter month) 2002 issue of Bon Appetit. I chose it because Swiss chard is growing up a storm on The Anthill Farm and, in turn, my fridge is stocked. I love love loved the pizza toppings here, but the crust wasn't necessarily a keeper. It was tasty and satisfied my craving, but I will keep looking for "the" recipe. Next on my list is Jim Lahey's no-knead recipe from the aforementioned (and somewhat manipulative:) New York issue, but in this particular case I wasn't willing to wait the 12 hours the dough needs to rise. The clock was ticking and I really wanted homemade pizza for dinner.


White pizza with Swiss chard, goat cheese and garlic

4 small or 2 large servings

Crust

3/4 cup warm water (105 to 115 degrees)
1 1/2 t. dry yeast
1 T olive oil
1 t. salt
1 3/4 cups flour

Topping
1 bunch (10 oz) Swiss chard, ribs removed
2 T olive oil
6 cloves garlic, minced

yellow cornmeal
8 oz mozzarella cheese, coarsely grated
4 oz soft goat cheese, cut into 1/4 inch rounds
  • For the crust:
  • Pour 3/4 cup water into a large bowl and sprinkle yeast over and stir to blend. Let stand for 10 minutes so yeast dissolves.
  • Add oil and salt and then 1 1/2 cups flour. Stir until well blended (dough will be sticky) and turn out onto a well floured surface and knead, adding just enough flour to prevent sticking, until smooth and elastic, about 5 minutes.
  • Form dough into a ball, place in a large oiled bowl, turning to coat, cover with a kitchen towel and set in a cool-ish room temp place until the dough has doubled in size, about 2 hours.
  • Punch risen dough down, reform into a ball and allow it to double in size again, about 3 hours.
  • Meanwhile, cook the chard (stems and leaves) in a large pot of salted boiling water for 2 minutes. Drain, rinse under cold water and squeeze dry. Coarsely chop cooked chard.
  • In a medium skillet, heat oil over medium heat and cook garlic until lightly browned. Remove garlic and set aside. Add the chard to the garlic infused oil and cook 1 minute. Season to taste.
  • Preheat oven to 500 and, if you have one, place baking stone at base of oven. If not, place oven rack in bottom position.
  • Punch down dough and form into a ball. Place on a floured work surface, cover with kitchen towel and let rest 30 minutes. Roll (primarily using your fingers to press and stretch dough) dough in to a 13 inch round and transfer to a rimless baking sheet sprinkled with cornmeal.
  • Sprinkle prepared dough with mozzarella cheese, leaving a 1 inch border. Scatter chard over mozzarella, top with goat cheese rounds and then reserved garlic. Brush the crust with olive oil and drizzle a bit over pizza.
  • Bake, rotating once, until crust is browned, about 15 minutes.
  • Enjoy!


Friday, July 10, 2009

Hand rolled egg noodles


I love to spend the day in the kitchen cooking, that seems pretty obvious, no? Throw in a gal pal (did I just write that?) and life is pretty much perfect. Good food, gossip and an ice cold Greyhound compliments of Gils...Yes, please.

This was Gillian's first foray into noodle making and she did a damn fine job. The noodles were toothsome and tasty and didn't need much in the way of sauce. We went with a quick saute of garlic and zucchini. Make these to impress someone. Seriously, homemade noodles, that's pretty special. Just like Gillian.


Hand rolled egg noodles

serves 4

1 cup flour
1/2 t salt
2 large eggs, lightly beaten
  • In a large work bowl, combine flour and salt and make a well in the center. Pour the eggs into the well and, using a fork, gradually incorporate the flour into the eggs. Continue until the dough comes together. It will be wet dough and look shaggy; not to worry.
  • Turn dough out onto a well-floured surface and with well-floured hands knead until dough is smooth and no longer sticky. Wrap in plastic and refrigerate for at least 30 minutes or as long as 24 hours.
  • Using half the dough at a time, on a well-floured surface, roll out the dough, making sure to rotate it after each pass of the rolling pin to prevent sticking, until it is about 1/8 inch thick. Don't be afraid to add flour.
  • Using a sharp knife or a pizza cutter, cut dough into whatever shape you like. Whatever you chose, try to be consistent in size and shape so the cooking time for your noodles is the same. Place cut noodles onto drying racks to air dry. Use immediately or dry until hard and store in an air tight container for a few days.
  • To cook, bring a pot of water to boil, salt water and add noodles. Cooking time will vary. I would recommend that you start checking after about 3 minutes. Gillian's took about 4 minutes.
  • Serve with whatever sauce you like. We sauteed garlic in olive oil, added thinly sliced zucchini and about a 1/4 cup of the cooking liquid, turned the heat off, covered to steam and added the noodles when they were ready. Yum!


Thursday, June 25, 2009

When I dip, you dip, we dip...


Here are a couple of great dips. They keep in the fridge for a good week, making them perfect for impromptu entertaining. Whip these up in advance and spoon out as needed. Serve with pita, crostini, crackers or crudite...I especially love a big dollop of the beet walnut puree atop a crunchy piece of cauliflower. They'd be fantastic as a sandwich spread, as well. Sky's the limit.

Beet and walnut puree
adapted from Spain...On The Road Again

1 cup walnuts
1 pound beets, trimmed, boiled or roasted, peeled, and cut into large chunks
1/2 cup olive oil
1/4 cup water
2 tablespoons tahini
1 to 2 tablespoons lemon juice
salt
  • Pulse the walnuts in a food processor until coarsely chopped. Add the beets and pulse until a rough paste forms.
  • Slowly add the olive oil, water, and tahini and pulse a few times, just until combined.
  • Add lemon juice and salt to taste.
Artichoke and white bean dip with rosemary

15-1/2 oz cannellini beans, drained and rinsed
14-1/2 oz artichoke hearts, drained and rinsed
1 small clove garlic, roughly chopped
2 T fresh lemon juice
2 T olive oil, more for drizzling
3 T freshly grated Parmigiano Reggiano
1 t fresh rosemary, chopper
salt and pepper

  • In a food processor, pulse the beans, artichoke hearts, garlic, and lemon juice to a smooth paste.
  • Slowly add the 2 T oil. If necessary, add 1 to 2 T water to get a smooth consistency.
  • Blend in the cheese and rosemary and season with salt and pepper.
  • Transfer to a bowl and drizzle with oil.
  • Enjoy!

Friday, June 5, 2009

Soba with Cilantro and Scallions


This is a quick, easy and super satisfying noodle dish. For supper, I like to serve it alongside simple roasted salmon. As a light lunch, I top it with a bunch of crunchy cucumber and creamy avocado and I'm as happy as can be.

Play with this recipe...add as much ginger, garlic and cilantro as you like. And throw in leftover shredded chicken, beef or whatever's in the fridge to make it more substantial. If you can't find soba noodles (though most grocery stores will have them) feel free to use any type of pasta.

Soba with Cilantro and Scallions


1 lb soba noodles, cooked according to directions on package
1/2 cup soy sauce
juice of 2 limes
3 garlic cloves, minced
1 1/2 T ginger, minced
1 T vegetable oil
2 t toasted sesame oil
1/4 cup chopped cilantro
3 scallions, sliced
garnish with diced cucumber or avocado
  • In a small bowl, whisk together soy, lime juice, garlic, ginger and oils. Pour over cooked soba, add cilantro and scallions and toss to combine.
  • Enjoy!

Tuesday, May 26, 2009

Pretty in Pink

beets


This is a super simple side dish. Just make sure to leave yourself enough time to roast the beets. Or, better yet, roast them the day before and this dish will come together in five minutes. The honey in the yogurt brings out the natural sweetness of the beets and the scallions add a nice savory crunch. Use in place of tzatziki, next to a grilled steak or, if you're like me, as lunch.

Roasted beets in honeyed yogurt

1 bunch beets
1/4 cup plain yogurt, I use low fat, but any will work
2 T honey
3 scallions, thinly sliced
  • Preheat oven to 400°F.
  • Wash beets and cut off and discard stems. Wrap each beet in foil, place on baking sheet and roast until tender when pierced with fork, about 1 hour 30 minutes. Cool until you are able to handle. Peel beets and slice or cut each into 8 wedges. Place in medium bowl.
  • In small bowl, combine yogurt and honey. Mix well. Add to beets and combine.
  • Sprinkle scallion over beets.
  • Enjoy!
roasted beets in honeyed yogurt

Wednesday, May 20, 2009

On a budget? Chickpeas do the trick.


Ever since I listened to NPR's "How Low Can You Go" with chef Jose Andres, I've wanted to make this dish. I love chickpeas, am always looking for new and satisfying vegetarian meals and, woohoo , this one is as cheap as chips. In fact, the premise of the show is to feed a family of four for under $10. Taking that even further, I increased the amount of chickpeas from 9 oz to 1 lb. (I left the remaining ingredients alone and the flavors were plenty strong.) The additional chickpeas stretch this, making it even more wallet-friendly, but when reheated the spinach became rather slimy and unappealing. I would recommend making a big pot and adding a handful or two of spinach to each individual bowl you dish out. One last note, the original recipe called for a pinch of saffron, but I didn't add it because I didn't have any...that's the way it goes in these here parts. Don't know what I missed and I'm okay with that; this was delish nevertheless!

Moorish-style chickpea and spinach stew

1 lb dried chickpeas
Pinch baking soda
6 garlic cloves, peeled and left whole
1/4 cup olive oil
2 oz white sliced bread, with the crusts removed
2 T Spanish sweet paprika
1 t ground cumin
2 T sherry vinegar
Salt and pepper to taste
1/2 pound spinach, washed and cleaned
  • The day before you cook, soak the chickpeas in cold water with a pinch of baking soda.
  • Drain and rinse the chickpeas.
  • In a large saucepan, add rinsed chickpeas and add cold water to cover by about 1 inch. Bring to a boil, reduce the heat to low and simmer for two hours, until the chickpeas are tender. Every 10 minutes or so, add 1/2 cup of cold water to slow down the simmering. By the end, the water should have reduced so it is barely covering the chickpeas. (I cooked the chickpeas a day ahead and cooled in the refrigerator over night. Before resuming the recipe, I warmed the chickpeas over low heat until just simmering.)
  • In a small saute pan over medium to low heat, brown the garlic in oil, about 3 minutes. Remove from the pan and set aside. Add the bread and brown on both sides, about one minute per side. Remove the bread and set aside.
  • Turn of burner and allow oil to cool for a few minutes. Add the paprika, cumin and vinegar to the oil and whisk to incorporate.
  • In a mortar, smash the reserved garlic and the browned bread to make a very thick paste.
  • Add the spice mixture along with the garlic and bread paste, to create a thick, stew-like sauce. Simmer for another 5 minutes. Season with salt and pepper to taste.
  • Ladle into bowls and top each with a big handful of spinach. (It's also great ladled onto prepared couscous.)
  • Enjoy!
Here's the radio show with the original recipe and great tips from chef Andres (like serving a fired egg on top of the beans and spinach!). In the interview, Michele Norris is a little skeptical about "talking" to the chickpeas, as Andres recommends, because she's not "fluent in chickpea". Good thing touching and tasting them works as well!
http://www.npr.org/templates/story/story.php?storyId=102854605


Tuesday, May 5, 2009

You take such darn good care of me, Quinoa.

The basics, yo.

Quinoa is the seed of a dark leafy plant related to Swiss chard and spinach, but because of its texture, it is usually grouped with the grains. It is light and fluffy, has a nutty flavor and is easily substituted for rice and couscous. It cooks quickly, is easy to digest and is a bona fide nutrient powerhouse. Need I say more? Not really, but I will...

-Quinoa is packed with protein. In fact, it's the only grain that is a complete protein, making it especially good for vegetarians and vegans.

-It's wheat and gluten free making it ideal for restricted diets and people with food allergies.

-It's low on the Glycemic Index and won't spike blood sugar levels. Great for diabetics.

-Full o' fiber. 'nuf said.

-Aaand, it's uber-packed with vitamins and minerals like potassium, magnesium and iron.
Woo hoo!

Now, get a hold of your excited self and make some quinoa!

Quinoa with black beans and tomatoes

2 t lime zest
2 T fresh lime juice
3 T olive oil (or whatever kind you like)
1 cup quinoa
15 oz. black beans, canned or soaked, rinsed
2 medium tomatoes (cherry or plum is fine too), diced and tossed with a pinch of sugar if needed
4 scallions, chopped
1/4 cup fresh cilantro, chopped

  • Whisk together lime zest and juice, oil, 1/2 t salt, and 1/4 t pepper in a large bowl.
  • Rinse quinoa VERY well in a sieve and drain.
  • To cook quinoa, remember, 2 to 1. 2 parts water to 1 part quinoa. Combine water, rinsed quinoa and a good pinch salt and bring to a boil. Cover, reduce heat to a simmer and cook for 10-15 minutes. You will know when the quinoa is cooked when: the water is absorbed, it's translucent and the germ of the seed shows a little white ring around the outside.
  • Add quinoa to dressing and toss until dressing is absorbed, stir in remaining ingredients and salt and pepper to taste.
  • Enjoy!

Tuesday, April 28, 2009

When I want to eat NOW

I am by no means a vegetarian, but on any old week night, I tend to lean that way. Last night I got home late and wanted something to eat that was good and satisfying, but above all else, quick and easy to prepare. This farro salad is just that. It takes all of 20-25 minutes to make and that's only because the farro takes that long to cook. If you are hungry (like I was) don't bother to cool the farro to room temp before dressing...all the better to soak up the balsamic vinaigrette. The firm and chewy farro makes this salad hearty enough to be a main dish for me, but for those of you who need a bit more, a grilled sausage rounds out the meal perfectly.


Farro with Cherry Tomatoes and Arugula

1 cup farro
1/4 cup olive oil
1/8 cup balsamic vinegar
salt and pepper
1/3 lb. cherry tomatoes, halved or quartered if large and tossed with a pinch of salt
1/2 lb. arugula
lemon wedge
  • Cook farro in amply salted water until al dente, 20-25 minutes, drain. Cool slightly before dressing with vinaigrette.
  • Emulsify (combine) oil and vinegar. I like to use an old jam jar to shake to combine. Add salt and pepper to taste. Pour over farro and mix well.
  • Add tomatoes. (Salad can be prepared up until this point a few hours in advance.)
  • When ready to serve, toss farro and tomatoes with arugula. Add a squeeze of lemon and freshly ground pepper, if you like.
  • Enjoy!

Monday, April 27, 2009

Work up an appetite

In the spirit of the season, I've got my mind on outdoor dining. Namely, the picnic. The glorious picnic! I kicked off this season with an intense hike up the (very) popular Breakneck Ridge. Appropriately named, Breakneck is no joke. The initial ascent requires a good pair of shoes, the use of your hands (as you are really bouldering, not hiking, at this point) and a fair bit of patience because it gets rather crowded. Luckily, once you've scrambled your way to the top, the crowd starts to disperse and you can enjoy the rest of your hike in relative peace. And, you've worked up a fine appetite with which to enjoy whatever you've packed for lunch. Did I mentioned that everything tastes better when you're outside and have breathtaking views of the Hudson? Well, anyway, it certainly seems that way. A simple (read boring) macaroni salad is elevated from passe potluck fare to a mouthwatering treat that provides sustaining carbs, just enough crunch and, if you're like me and add a handful of rogue capers, a bit of briny flavor to punch up the mellow mayonnaise.

Almost Old-fashioned Macaroni Salad

1lb. elbow macaroni, cooked al dente
3 T. white vinegar
1/2 sweet onion, minced
2 stalks celery, minced
2 T. capers, rinsed, drained and coarsely chopped
1 cup mayonaise
salt and freshly ground pepper

  • Cook pasta in amply salted, boiling water following instructions on the box. Test often so as to not over cook. Drain and immediately toss with vinegar.
  • Add onion, celery, capers and mayo; mix well. Season with salt and pepper to taste.
  • Enjoy!

My boyfriend and I are hearty eaters, so we rounded out our picnic with BLTs on homemade oat bread and nutty "Power Bars". Recipes to come.....

If you are interested in hiking Breakneck, check out the following websites:
http://www.nynjtc.org/hike/breakneck-ridge-trail
http://as0.mta.info/mnr/schedules/sched_form.cfm