Showing posts with label quick and easy. Show all posts

Tuesday, December 15, 2009

Avocado Toast

I feel like I'm moving a million miles an hour these days. Perhaps that's hyperbole, but I am movin', so I'll cut right to the point- A GIRL'S GOTTA EAT and creative cooking and leisurely eating is certainly not in the cards until this here catering season comes to a screeching halt. Until I've got the time, I'll just have to eat fast food. Enter the avocado.


Now this is what I call fast food! It's healthy, tasty, totally satisfying and, well, fast. What you see pictured below is unadorned avocado toast. Go ahead dress her up though... add olive oil and some cayenne pepper for color. Top with a handful of spicy arugula, a spritz of lemon juice and freshly cracked black pepper. Or throw on some diced pickled jalapeno. Yummmy vinegary jalapenos;) Whatever you do, get on the avocado bandwagon. Pick up a couple once a week, give them a day or two to ripen and you'll have a happy breakfast, lunch or dinner at the ready.


Avocado Toast

serves 2

1 ripe avocado
2-4 slices of bread, depending on the size/shape and how hungry you are
salt
  • Cut the avocado in half by rotating a sturdy knife around the pit. Rotate the halves to split and remove the pit. Slice avocado (see below).
  • Toast bread to desired darkness. Spoon avocado onto toast and spread evenly. Sprinkle with salt.
  • Enjoy!

Sunday, November 29, 2009

Bourbon Spiked Cider

Aahh, it's SUNDAY NIGHT. After a holiday weekend, no less! Ease into the work week with a warm bourbon spiked cider. Sip and relax...it's not Monday yet.


Bourbon Spiked Cider

serves 2

1 1/2 cups apple cider
1 cinnamon stick
4-5 whole cloves
orange peel
3-4 oz bourbon
  • In a small saucepan, combine the cider, cinnamon, cloves and orange peel. Bring to a slow bowl, turn heat down to low, and allow to simmer for anywhere from 10 minutes to a few hours (you are simply infusing the cider with the spices, so the longer they steep the more their flavors will shine through).
  • Divide the bourbon between two glasses and pour over hot cider. Garnish glass with a cinnamon stick, if you like.
  • Enjoy!

Thursday, October 22, 2009

Apple Muffins

These muffins are a great fall treat. Eat 'em for breakfast on-the-go, as an after school snack, or serve them drizzled with warm caramel sauce for dessert.


Apple Muffins

makes 12

1 cup whole wheat flour
1 cup all-purpose flour
1 t. baking powder
1 t. baking soda
1/4 t. salt
1 T cinnamon
1/2 cup (1 stick) butter, room temperature
3/4 cup packed brown sugar
1 egg, lightly beaten
1 cup vanilla yogurt, stirred well (buttermilk is great too)
2 large apples, coarsely chopped
  • Preheat oven to 450 and either grease or line a 12 cup muffin tin.
  • In a medium bowl, combine the flours, baking powder, baking soda, salt and cinnamon.
  • In a mixing bowl, cream the butter until it has lightened in color and become slightly fluffy. Add the sugar, mix until combined, then add the egg. Slowly add the yogurt; mix well.
  • Stir the dry ingredients into the wet and, while there are thick streaks of flour, add the apple. Mixture will be very thick.
  • Using an ice cream scoop, divide the batter into the muffin cups.
  • Bake for 10 minutes, turn the temperature down to 400 and bake for 18-20 minutes.
  • Cool in tin for five minutes before transferring to a wire rack to cool completely.
  • Enjoy!

Wednesday, October 7, 2009

Roasted Eggplant Dip

I implore you to double, triple or quadruple this recipe. Seriously, so that no one gets hurt in the rush to scoop up every last bit of dip. It's THAT tasty! The roasted eggplant is silky smooth after a whiz in the food processor. And with loads of parsley and a touch of lemon, it's herbaceous and bright. The perfect antidote for a blustery fall day.


Roasted Eggplant Dip
serves 2

3 small eggplants
2 garlic cloves
juice of half a lemon
1/2 cup parsley, roughly chopped
1/3 cup olive oil
salt and pepper to taste
  • Preheat oven to 400.
  • Pierce each eggplant with a fork several times. Roast until tender, 25-30 minutes. Allow to cool slightly and remove the pulp from the skin.
  • In the bowl of a food processor, combine the eggplant, garlic, lemon juice and parsley. Pulse until combined.
  • With the processor running, slowly add the oil. Combine until smooth. Add salt and pepper to taste.
  • Serve with toast, pita, bread sticks, vegetables...
  • Enjoy!


Thursday, September 24, 2009

turkey burgers

This is Sara Moulton's recipe. It's one of my staples. Not that I eat turkey burgers every week, or even every month, but I've been making these sliders for upwards of nine years. Holy potato that makes me feel old!

I learned to love food and the joys that come with it from my family. I took my first steps learning to cook watching the Food Network (it's a bit different now, no?). Watch, shop, experiment and repeat.... I also channeled Julia Child's make no apologies mentality. (Admittedly, I still struggle with that.) Emboldened by a few successes, I made my first ever Thanksgiving dinner. It was a full spread for ten hobbled together in a teeny weeny kitchen in London. Luckily, I had done my research, learned to chop an onion from Sara on the hugely educational (and fun!) Cooking Live and had someone who was psyched to grill the second turkey outside on the teeny weeny balcony. Oh, and most of the guests were Brits who had no real connection to Thanksgiving and, thus, had no real expectations. Bring on the Champagne!

Whatever you do, get your bad self into the kitchen and start cookin'! Try these burgers. My guess is that you too will make them for years to come.

turkey burgers
adapted from Sara Moulton Cooks at Home

serves 4

2 tablespoons vegetable oil
1 small onion, finely chopped
1/2 small red bell pepper, finely chopped
1 teaspoon kosher salt
1 pound ground turkey
Freshly ground black pepper
  • Preheat the oven to 400.
  • Heat 1 T oil in a small skillet over medium heat. Add the onion and red pepper and cook, until softened, about 5 minutes. Cool to room temperature.
  • Combine the onion, pepper, salt, and turkey in a large bowl. Season with pepper. Mix well and form into 4 large patties.
  • Heat the remaining tablespoon of oil in a large ovenproof skillet over medium heat. Place the burgers in the skillet and cook until well browned, about 5 minutes per side. Transfer to the oven and cook until firm to the touch, about 6 minutes. Serve with peach jalapeno salsa.
  • Enjoy!
Note: Sara adds 1 T Creole spice mix with the salt and serves the burgers with tomato and corn salsa.

Wednesday, September 23, 2009

peach jalapeno "salsa"

This really isn't salsa at all. It's basically sliced peaches, sliced jalapeno and a squeeze of lime. Savor the last-of-the-season peaches with a little bit of bite. (If you don't like it hot, dice the pepper and use sparingly.) Serve alongside turkey burgers or grilled chicken. Dinner is served.


peach jalapeno salsa


2 ripe peaches, sliced
1 jalapeno, ribs and seeds discarded; thinly sliced
juice of 1 lime
pinch sugar
  • Combine all ingredients and allow to rest for 20 minutes-ish so the flavas meld.
  • Enjoy!

Sunday, September 13, 2009

David Lebovitz's Cheesecake Brownies

These disappeared before I had a chance to take a photo of the cut brownies. Visualize rich chocolatey goodness and you'll have a pretty good picture.


Cheesecake Brownies

6 T unsalted butter, cut into pieces
4 oz bittersweet or semisweet chocolate, chopped
2/3 cup sugar
2 large eggs, at room temperature
1/2 cup flour
1 T unsweetened cocoa powder
1/8 t. salt
1 t. vanilla extract
1/2 cup chocolate chips
8 oz cream cheese, at room temperature
1 large egg yolk
5 T sugar
1/8 t. vanilla extract

  • Preheat oven to 350. Line a 9-inch square pan with foil or parchment paper, leaving an overhang; grease lightly.
  • In a medium saucepan, melt the butter and chocolate over low heat, stirring until smooth. Remove from heat and beat in the 2/3 cup sugar, then the eggs.
  • Mix in the flour, cocoa powder and salt, then the vanilla and chocolate chips. Spread evenly in prepared pan.
  • In a separate bowl, beat together the cream cheese, the yolk, 5 T sugar, and vanilla until smooth. Using a dull knife of spatula, swirl the cream cheese mixture with the chocolate batter.
  • Bake for 35-37 minutes, or until the batter in the center of the pan is just set.
  • Cool brownies completely in pan.
  • Cut into square and Enjoy!


Monday, August 31, 2009

Banana chocolate chip muffins


Welcome to the "Big Apple," have a banana muffin.

This past weekend, my boyfriend's family came into town to visit. Even though they were staying at a hotel (eight people crashing in our one bedroom apartment was not an option), I wanted to greet them with something homemade and tasty. I figured these muffins were a good option because they fill the aforementioned criteria and they travel well. They got rave reviews. Coming from four finicky nieces and nephews between the ages of 8 and 12, that's no small feat. File this recipe under "keeper".

These muffins aren't particularly sweet, but they are packed with chocolate chips. Go ahead and increase the amount of sugar or decrease the number of chips. You can also substitute nuts or dried fruit for the chocolate. The recipe can successfully be halved or doubled.

Banana chocolate chip muffins
makes 24

4 cups whole wheat flour
1 T baking powder
1/2 t baking soda
1/2 t salt
1/2 t cinnamon
5 or 6 large very ripe bananas, smashed
4 large eggs, lightly beaten
1/2 cup maple syrup
1/2 cup brown sugar
2/3 cup milk
1/2 cup canola oil
2 t vanilla
1 1/2 cup semi-sweet chocolate chips
granulated sugar, for sprinkling
  • Preheat oven to 350 and place racks in the upper a lower thirds of the oven. Use muffin cups or lightly grease tins.
  • In a large bowl, combine the dry ingredients (flour through cinnamon).
  • In a medium bowl, whisk the rest of the ingredients, except for the chips, until thoroughly combined and smooth.
  • Add the wet mixture to the dry and mix until there are only a few streaks of flour. Add chocolate chips and stir only a couple more times.
  • Using an ice cream scoop, scoop batter into prepared muffin tins. Sprinkle lightly with sugar.
  • Bake for about 25 - 30 minutes, rotating from top to bottom and front to bake halfway through baking time, or until a toothpick comes out clean.
  • Enjoy!

Thursday, August 27, 2009

Leek + goat cheese frittata


Supper is served and lunch is in the fridge!! When I'm pinched for time, I often defer to the incredible egg. I always have some in the fridge for moments like these and, because the urge to bake might hit me at any moment and (the idea of) a trip down and back up to my 5th floor walk-up to buy bland eggs from the corner bodega will surely blot out my desire. So, pick up some huevos.... They're an inexpensive (even when you buy them at a farmers market) source of protein and a blank canvas ready for anything that looks good at the market or whatever's past its prime in the fridge.

I like eggs (point taken) and I like to use them to make frittatas. Again, it's that pressed-for-time thing. This omelet, of sorts, comes together in less than 10 minutes. And the leftovers are perfectly flat for a sandwich. For this particular frittata, I used leeks and goat cheese.

Leek + goat cheese frittata
serves 2 with leftovers

2 large leeks, dark green parts discarded; washed and cut into 1/4 inch rounds
6 eggs
splash milk
salt and pepper to taste
4 oz. goat cheese
  • In a medium saute pan, heat enough oil to coat bottom of pan over medium heat. Add leeks and cook until soft, 10 minutes.
  • Combine eggs, milk, salt and pepper. Whisk well.
  • Preheat broiler
  • Add leeks to egg mixture and pour into a nonstick pan over medium-low heat. Cook slowly, without stirring, for about 4 minutes, or until the bottom has set. Scatter teaspoonfuls the cheese around the top of eggs (it should sit on top of the liquid eggs) and continue to cook for another minute.
  • Put the saute pan with eggs under the broiler until the eggs have set and the cheese is warm, 3 minutes. Remove from broiler and top with freshly cracked pepper.
  • Serve with a green salad and potatoes.
Potato "salad"

1 onion
olive oil
jalapeno, minced
salt
2 large potatoes
vinegar
pepper

Monday, August 24, 2009

Plum Torte


According to Florence Fabricant, the editor of The New York Times Dessert Cookbook, "This is the most frequently requested recipe that has been published in the Times." And how! This cake is super super (super) easy to make, and it really showcases the stone fruit of the season. Get thee you a farmers market and MAKE IT using whatever's ripe and raring to go; plums, peaches, nectarines, apricots or pluots... And visions of tortes will dance in your head.


Plum Torte

a Marian Burros recipe

1/2 cup unsalted butter, softened
3/4 cup sugar, plus more for topping
1 cup all-purpose flour
1 t. baking powder
pinch salt
2 large eggs, lightly beaten
12 Italian prune plums, halved and pitted
1 t. ground cinnamon
  • Preheat oven to 350
  • Sift together flour, baking powder and salt.
  • In a separate bowl, cream butter and sugar until light and fluffy. Add dry ingredients to creamed butter. Add eggs, and beat well.
  • Spoon the batter into an 8, 9 or 10-inch springform pan and smooth evenly. Place plum halves skin side up on top of batter. Sprinkle lightly with sugar, depending on the sweetness of the fruit. Sprinkle with cinnamon.
  • Bake for 40-50 minutes, or until golden brown. Cool cake in the pan until room temperature. Remove sides of pan and serve. Cake may be refrigerated or frozen at this point. If frozen, defrost and reheat briefly for at 300.
  • Enjoy!


Monday, August 17, 2009

Gazpacho


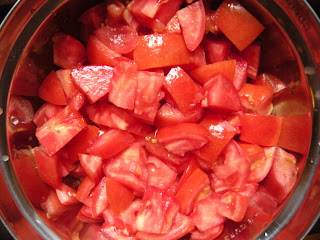
Hooray, it's tomato season! For the next month or so I can think outside of the can and use fresh tomatoes to my heart's content (literally). The irresistible sweet and acidic fruit never comes cheap and this summer the prices have been inflated due to devastating "late blight", a fungal disease that has knocked out a huge number of the tomatoes in the Northeast. Our cold and wet spring made for unhappy tomatoes. And, in turn, unhappy farmers, who often rely on tomatoes to turn a profit. So, all the more reason to get out there and buy what's left of this years not-so-bumper crop. Make some gazpacho...no cooking required!

Gazpacho

6 ripe tomatoes, cut into chunks
1/2 large cucumber--peeled, halved, seeded and cut into chunks
1 green bell pepper, coarsely chopped or, for added flavor, roasted and cut into strips
2 garlic cloves, smashed
1 cup water
1/3 cup extra-virgin olive oil
2 tablespoons sherry or red wine vinegar
salt to taste

optional garnish:
diced cucumber
sliced onion
hot sauce
  • In a blender or food processor, combine the tomatoes, cucumber, bell pepper, garlic, water, oil and vinegar and process until coarsely pureed. Season with salt and adjust amount of vinegar if needed. Refrigerate until chilled.
  • Serve in chilled bowls with garnish.
  • Enjoy!


Monday, August 10, 2009

Farro w eggplant + tomatoes


Hitting the farmers market late in the day might not be the best time to find a wide variety of produce, or if you're looking for something in particular. But, it is the best time to find a bargain. I brought home a bounty without spending a fortune!

Among other things, I got a big eggplant that I typically would've skipped in search of a couple of smaller ones, but it was slim pickins and the reduced price was right. With an eggplant in my possession and pasta on the brain (always), I bought some super sweet plum tomatoes to make a quick summer sauce. I ended up using farro instead of pasta and purslane (the guy at the market was practically giving it away) instead of basil in the sauce, so the following is merely a base recipe. Whatever you do though, this is a bowl full of summer goodness.

Farro w eggplant and tomatoes
serves 2 with a leftover lunch

3 T olive oil
1 large eggplant, cut into cubes
5 plum tomatoes, cut into a large dice
1 cup semi-pearled farro
1/4 cup sherry vinegar
1 T pine nuts, toasted
use any herbs you have on hand as garnish
  • In a large saute pan, heat olive oil over medium-high heat and saute eggplant until soft and caramelized, 10 minutes. Lightly season with salt, add tomatoes, reduce heat to medium and cook until most of the liquid has evaporated, 10 minutes. Add herbs and season to taste.
  • Meanwhile, cook the farro in boiling salted water until al dente, about 20 minutes, drain and add vinegar.
  • Serve sauce over farro and sprinkle with pine nuts.
  • Enjoy!

Wednesday, August 5, 2009

Chill out w cantaloupe soup


The farm stands in Stone Harbor, NJ are brimming with the season's bounty. Melons, berries and corn beg to be eaten now, while the nectarines and peaches, still a little bit hard, will be perfect in a few weeks.

The earthy fragrance of the cantaloupe overwhelmed our car on the short drive to the homestead and, as it turned out, was already passed its prime. Luckily, family run Conovers was happy to give us a new one! Initially, I thought we'd have cantaloupe and bacon for breakfast (a spin on Prosciutto and melon), but because our first try was thwarted, we ended up bringing the new melon back to NYC and, by that time, I was craving something different...

Having indulged in more than a happy amount of summertime "junk" food, enter cantaloupe soup. Obviously, my version of a cleanse doesn't compare to the aggressive Master Cleanse (even remotely), but frankly, I don't want to spend 10 days in the bathroom. Two days of fruit soup and some poached chicken broth with greens, and my stomach is already grumbling again. That's all I needed; to feel hungry again. Hungry for some damn good melon soup! Serve it for breakfast, brunch and dessert. Or, if you get over-heated in your air conditioner-less apartment.


Cantaloupe Soup


1 cantaloupe
2 cups orange juice, divided
juice of half a lime
juice of half a lemon
1 t honey
1/8 t vanilla
1/4 t salt
1/4 t five-spice powder
garnish with a dollop of plain yogurt
  • Prepare cantaloupe: cut in half crosswise and scoop out seeds, cut in half again, place on flat side and cut rind from the flesh from top to bottom (see below). Cut melon into chunks and place in the bowl of a food processor or blender. Add 1/2 cup orange juice and blend until smooth.
  • Transfer to a bowl or large Tupperware and add the remaining ingredients. Mix well and refrigerate for a least an hour. Serve chilled.
  • Enjoy!


Monday, June 8, 2009

chocolaty + crunchy + gooey = happy


These bars are great for the summertime because you don't need to turn on your oven. And, they come together super fast so you can be in and out of the kitchen with a plateful of candy in no time. They are pretty darn tasty to boot. Though, ever a fiddler, next time I will add 1 1/2 cups peanuts and substitute a 1/2 cup of dehydrated banana chips for a 1/2 cup of the rice cereal for a some intrigue. They are a bit too messy for me (though it hasn't stopped me from eating them), but everyone else who's tried them has given a very chocolaty thumbs up.


Candy Bars

Makes about 24 squares

1/2 cup (120 grams) smooth peanut butter
1/3 cup (80 ml) light corn syrup
1/3 cup (80 ml) honey
1/2 cup (45 grams) cocoa powder, unsweetened or Dutch-processed
1/4 cup (55 grams) light brown sugar
3 cups (180 grams) miniature marshmallows
1 teaspoon pure vanilla extract
3 cups (80 grams) crisp rice cereal
1 cup (120 grams) peanuts
8 ounces (230 grams) semi sweet chocolate, chopped
1 tablespoon (14 grams) unsalted butter

  • Butter an 9 x 13 inch baking pan. Set aside.
  • In a large saucepan combine the peanut butter, corn syrup, honey, cocoa powder, and light brown sugar. Place over medium high heat and bring mixture to a boil. Reduce the heat to low, add the marshmallows, and stir constantly until mixture is melted and smooth. Remove from heat and stir in the vanilla extract, rice cereal, and peanuts.
  • Press this mixture into the prepared pan and allow to set.
  • In a heatproof bowl over a saucepan of simmering water, melt the chocolate and butter.
  • Spread chocolate mixture over the squares and refrigerate until chocolate has set.
  • Cut into squares with a sharp knife. Serve cold or at room temperature.
  • Enjoy!


Tuesday, June 2, 2009

Granola Bars


The plan was to make these granola bars to take on our Memorial Day camping trip, but that didn't happen. I tend to get excited and overextend myself in ways that I don't need to; like making granola bars on top of trail mix on top of... We had enough victuals to last a week in the woods let alone a weekend (we actually packed a fair bit out). So, it was probably a good move to
opt for a few extra hours of sleep before the trip instead of making these bars. I am, however, glad that I didn't file the recipe away and forget about it because it's definitely a keeper. My boyfriend (the primary granola bar eater around here) declared them a success and packed a bunch to take to work. Never is a dangerous word, but I'm going to throw caution to the wind and say that I might never buy granola bars again. These are easy to make and very close to the real deal. Done and done.

Homemade granola bars
adapted from Joy of Baking

makes 12 4 1/2 x 2 inch bars

2 cups old fashioned rolled oats
1 cup unsweetened shredded coconut
1 cup sliced almonds
1/4 cup raw sunflower seeds
1/4 cup raw pumpkin seeds
1/2 cup dried apricots, diced
1/2 cup dried prunes, diced *Use any fruit. Dice, if large, but dried cranberries etc. are fine as is.
1/4 t salt
3 T butter, cut into pieces
1/4 cup light brown sugar
2/3 cup honey
1 t vanilla
  • Preheat oven to 350, place rack in middle position and butter a 9 x 13 inch baking pan.
  • In a large bowl combine oats, coconut and almonds, transfer to a baking sheet and bake for 15 minutes.
  • Meanwhile, in the same large bowl, combine the sunflower and pumpkin seeds, dried fruit and salt. Add the oat mixture when it's finished toasting and mix well.
  • In a small sauce pan, combine the butter, sugar, honey and vanilla and bring to a boil over medium heat. Reduce heat to low and continue cooking for 2 minutes.
  • Pour wet ingredients over the dry and stir until well coated. Transfer mixture to prepared baking pan. Using wet finger tips, press evenly into pan. Bake for 20 - 25 minutes or until light golden. The longer you cook the bars, the crunchier they will become.
  • Remove bars from oven and allow to cool for 2 hours before cutting because they firm up as they cool. Bars will keep for several days at room temperature.
  • Enjoy!
Here are a couple of camping pictures just for fun. I love the Adirondacks!

Sunday, May 31, 2009

Avocado Mango Salsa + Honey Mustard Chicken


I served this salsa with leftover honey mustard chicken (recipe below). The sweetness of the mango brought out the subtle honey glaze on the chicken and the avocado and onion add a deeply savory note. The cilantro adds great freshness...you really can't have enough of it. The salsa is cool, light and creamy; I could absolutely eat it straight out of the bowl like I would a bowl of ice cream.

Avocado mango salsa

serves 2-4

juice of 1 lime
1 ripe mango
2 ripe avocados
half small onion, fine dice
handful cilantro, chopped
salt and pepper to taste
  • Squeeze lime juice into a medium bowl
  • Cut mango into cubes: 1) A mango has a flatish oblong pit in the center of it. Your goal is to cut along the sides of the pit, separating the flesh from the pit. Holding the mango with one hand, stand it on its end, stem side down. With a sharp knife in your other hand, cut from the top of the mango, down one side of the pit as close to the center (pit) as possible. Then repeat with the other side. You should end up with three pieces - two halves, and a middle section that includes the pit. 2) Take a mango half and use a knife to make lengthwise and crosswise cuts in it, but try not to cut through the peel. Turn the mango inside out so that the flesh of the mango protrudes. 3) Use a small paring knife to cut away the pieces from the peel. Finally, I like to pick up and eat the bit of mango left on the pit (it gets a touch messy and makes me feel like a kid again:), but you can use a knife to cut it off and add to your salsa. Add cubed fruit to bowl with lime juice.


  • Cut avocado into cubes: halve each avocado, remove the pit and, as you did with the mango, use a knife to make lengthwise and crosswise cuts in the flesh. In this case, use a spoon to scoop out the avocado into the bowl with the mango.
  • Add onion and cilantro to mango and avocado and stir to combine. Add salt and pepper to taste. If you don't eat right away, add one of the avocado pits to the bowl and use plastic wrap to top the salsa directly (the plastic wrap should touch the mixture). These methods will keep the avocado from oxidizing (as will the acid in the lime juice).
  • Enjoy!


Honey mustard chicken
serves 4

1 whole chicken, cut into 8 pieces (or, if you don't want to break down the chicken, buy the pieces that you prefer)
1/8 cup olive oil
salt
1/2 cup honey
1 T Dijon mustard
1/2 t pepper
  • Preheat oven to 400, place rack in middle position and line a baking sheet with foil (it'll make fo a much easier clean up).
  • On a baking sheet, toss chicken with oil and salt, place skin side down and bake. Remove the breasts and wings after 2o minutes and continue to cook the legs and thighs for 5 more minutes.
  • While the chicken is baking, combine the honey, mustard, pepper and a pinch salt in a small sauce pan over medium heat. Stir occasionally and bring to a boil. Remove from heat.
  • Remove chicken from oven and transfer to platter. Discard the fat from the baking sheet. (This is super important because the excess fat will smoke in the broiler and likely set off your fire alarm.)
  • Preheat broiler
  • Toss chicken with honey mustard and place on baking sheet skin side down. Broil for 5 minutes. Turn the chicken over and cook 4-5 minutes longer. During last 5 minutes, check every couple of minutes because the glaze will burn quickly. Remove from broiler and let rest for 5-10 minutes. Chicken is great hot or at room temperature.
  • Enjoy!

Tuesday, April 28, 2009

When I want to eat NOW

I am by no means a vegetarian, but on any old week night, I tend to lean that way. Last night I got home late and wanted something to eat that was good and satisfying, but above all else, quick and easy to prepare. This farro salad is just that. It takes all of 20-25 minutes to make and that's only because the farro takes that long to cook. If you are hungry (like I was) don't bother to cool the farro to room temp before dressing...all the better to soak up the balsamic vinaigrette. The firm and chewy farro makes this salad hearty enough to be a main dish for me, but for those of you who need a bit more, a grilled sausage rounds out the meal perfectly.


Farro with Cherry Tomatoes and Arugula

1 cup farro
1/4 cup olive oil
1/8 cup balsamic vinegar
salt and pepper
1/3 lb. cherry tomatoes, halved or quartered if large and tossed with a pinch of salt
1/2 lb. arugula
lemon wedge
  • Cook farro in amply salted water until al dente, 20-25 minutes, drain. Cool slightly before dressing with vinaigrette.
  • Emulsify (combine) oil and vinegar. I like to use an old jam jar to shake to combine. Add salt and pepper to taste. Pour over farro and mix well.
  • Add tomatoes. (Salad can be prepared up until this point a few hours in advance.)
  • When ready to serve, toss farro and tomatoes with arugula. Add a squeeze of lemon and freshly ground pepper, if you like.
  • Enjoy!